Showing posts with label paint finishes. Show all posts

Friday, September 18, 2015

Not all change is good!

There have been a lot of life changes since my last post. Both of us are now retired, we've moved out of our Sydney apartment, disposed of all of our furniture and so on, put personal belongings in storage and are now full-time house/petsitting.  Of course most people who live this type of nomadic lifestyle don't have to move a three level dollhouse and mini-making equipment with them so that aspect is a little challenging but otherwise we're enjoying the experience. 

In regard to my many many boxes of mini stuff working out what to store and what to take was a bit of a challenge and I did make a few mistakes (like forgetting the box of door handles) but mostly I have with me what I need for the moment. I'm concentrating on finalising lighting decisions and finishing the walls and floors on the third floor (hallway, bathroom and double width bedroom). 

Below left is a mock-up of the bedroom interior. The grey door has had more coats of paint on it than most of us have had hot dinners! It was previously green on both sides (with multiple shades and coats involved in that too) but I decided to change to grey on the bedroom side. Quite liked the result (left) after a few coats, washes and sanding but decided this morning to give it a final coat of 50/50 pale grey paint and matte glaze to soften it, result on the right. 


I think it still needs just a hint of dry brushing with a little bit of green on the lower panels so that it looks like the grey has worn and allowed a little of a previous coat of paint to show through, but otherwise I'm pleased with the softer look and will try to resist playing with it again.

However, sometimes change is not a good thing and I really should leave well enough alone!! I don't know why I thought for even a second that it was a good idea to put a coat of the light grey 50/50 glaze on the cream hallway side of the door as well, but I did. Now, keeping in mind that it took me AGES to get this side of the door (which was also green) to pretty much match the cupboard door which was done months and months ago, this is clearly one of the stupidest and logic defying changes I've ever made. Honestly, sometimes I should be supervised!!
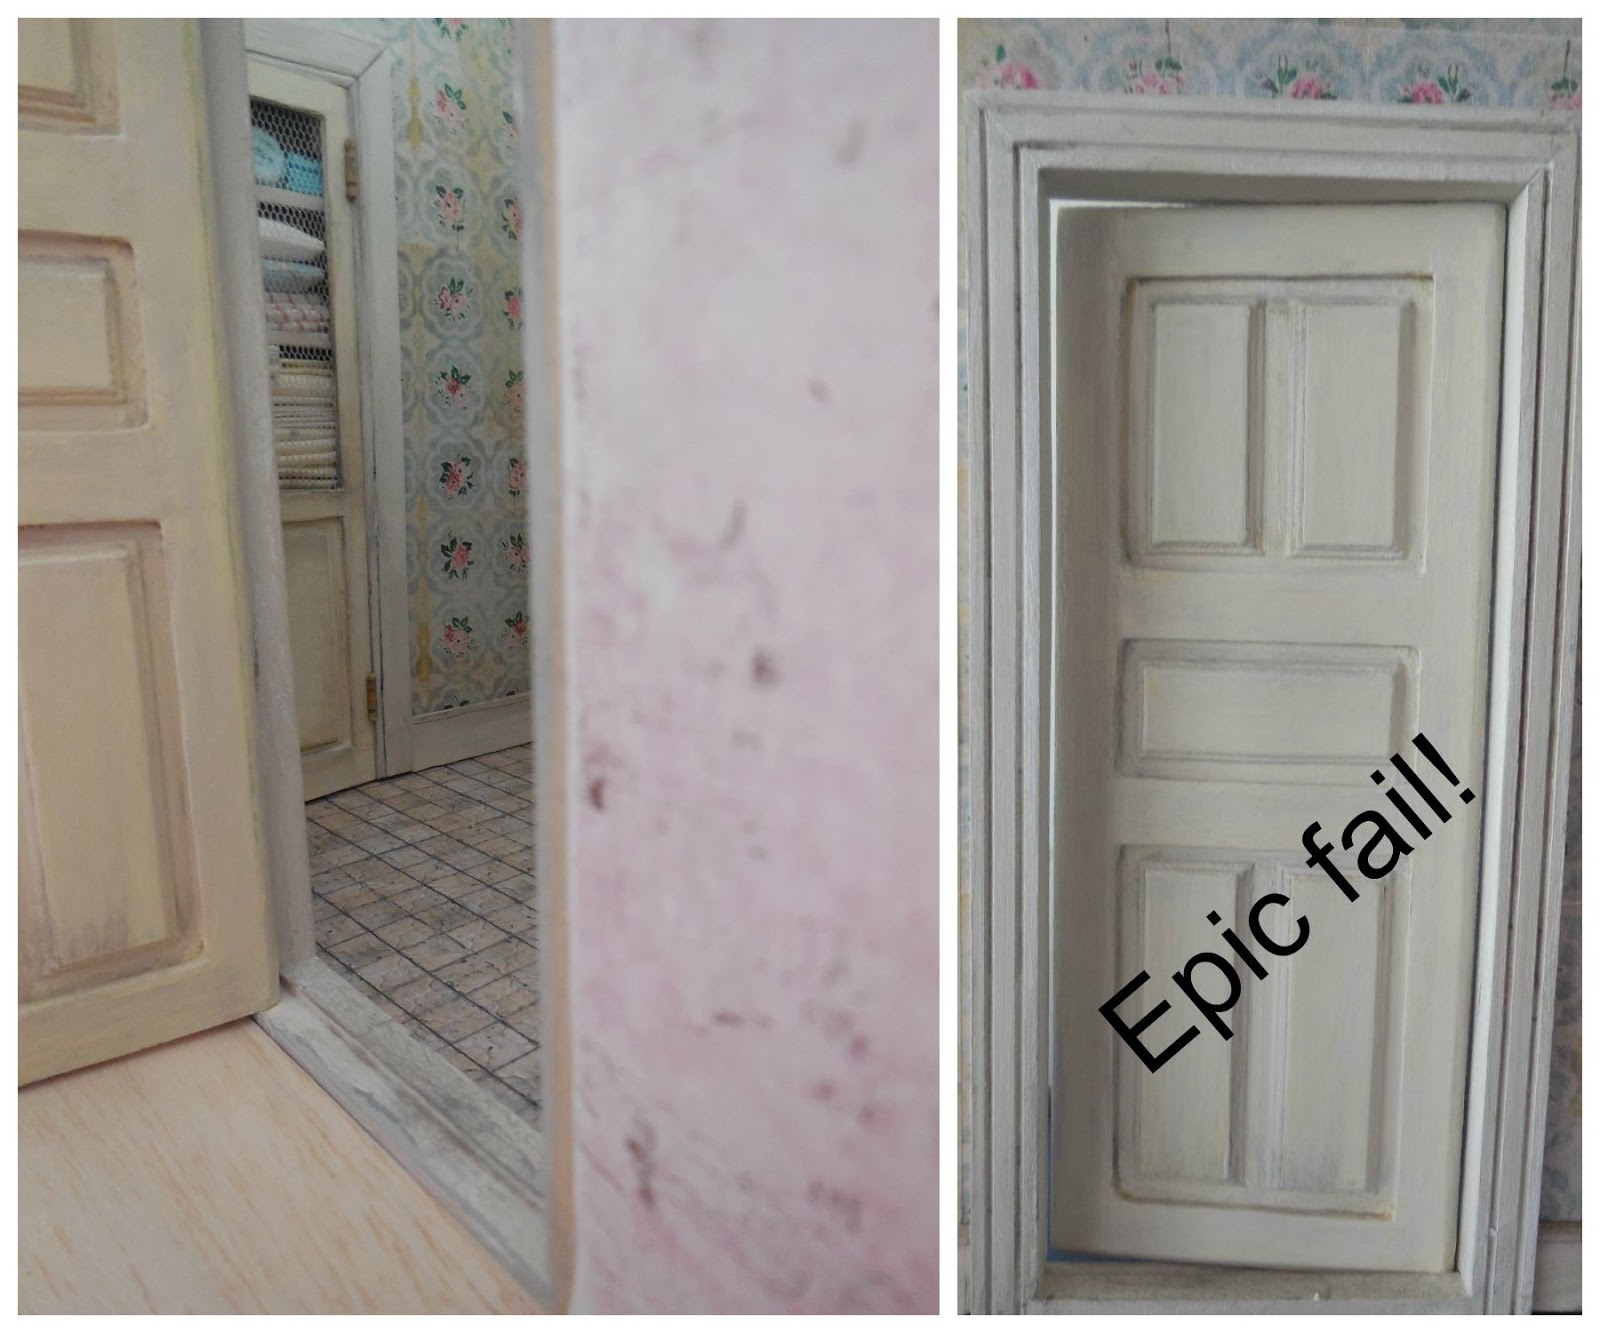

Given the number of times I do and redo, and redo again (and again!) it's no wonder it takes me so long to complete a project! 


Tuesday, April 7, 2015

Aged paint finish on the salon walls

7 days and 7 coats of paint later, including several washes and some sponging, I think the salon walls are pretty much as they need to be although I might try an almost transparent wash of gloss medium and light green to counter the slightly too flat/chalky finish. The variations are fairly subtle so I hope you can see they actually are there, but then that is the idea really, if they were too obvious I would have totally failed. It should look aged but not like several different painters, all with different paint pots, have been let loose after entirely too much red wine! 


Next step is reconstructing the room and decorating it - yay! the fun bit at last - I can get all sorts of delicious bits and pieces out of their boxes and into their 'home'.  


Tuesday, March 13, 2012

My giveaway surprise prizes revealed


This is the 'surprise package' that the winner of my recent giveaway, Jennybee, received: an aged table and cupid with a little set of mini mail as well as the set of doilies.  


The mini mail was included for everyone who won the doiley sets (I didn't realise until I saw this photo that I'd forgotten to 'age' the edges of the envelope and postcards!).  The tiny photo in the envelope is of my mother as a young girl.  She's now becoming a bit famous in the mini world - oh how she would blush at the thought.

A few of you have noticed that I haven't been very active around Blogland for a while - I've got quite a lot of non-mini projects going on at the moment which are taking my time and attention but I hope to see more of what you're all doing soon - as well as get back to doing some mini work myself!

My 'guilty secret' is that the dollhouse for the little girls hasn't progressed beyond what you see on the post of 25 January :(   If I don't get busy on that again very soon it'll be lucky to be delivered by NEXT Christmas!  I hope I'll be back shortly with some progress to show you :)

And lastly a note to say 'HI' to new Followers, thanks for dropping by!  

Friday, May 6, 2011

Playing with patina "DIY" from ultra grunge to prettyish

The finish on these doors is my attempt at patina similar to the real cabinet in a previous post (two below this one).  Reproducing the aged finish on these doors was a bit of a challenge as they'd already been painted - originally dark green and then repainted in dark French grey.  The first challenge was to cover the grey with a colour resembling raw wood, that was achieved with a mix of acrylic paint and wood stain.  After that was dry it was covered with a thick coat of crackle medium which was left overnight to dry thoroughly.  The top coat is a very pale grey, almost white.  When that was dry on the surface, but not thoroughly right through, it was rubbed over with a damp cloth.  In some cases the paint was almost removed, in others just the surface, and some places not at all.  The same technique was used on the bench plus a coat of 'dirty wash' (a mix of mostly water with a little black acrylic paint added). The staining on the 'plaster' wall was done with fairly strong coffee - you might recognise the wall and floor- it's the brocante, but not as clean looking as you've seen it before :)
 
Like most budget 'ready-made' furniture this chair started life stained and varnished.  OK for some settings but of course I couldn't resist getting out the paint brush and giving it a bit of grunge/age.  It was first sanded a bit then had a couple of coats of gesso followed by a few coats of light cream and then a thinnish grey wash.  Wear spots were sanded then it got a 'dirty wash' made from a little dark brown stain and lots of water.

The cutlery tray is balsa lightly stained with a thin solution of a water based wood stain (before putting a water based stain onto a piece that has been glued together with a water based adhesive wait until the glue is well and truly dry or it will fall to pieces!  -  I found that out the hard way). This does raise the grain a bit but since we're looking for an aged look, not perfection, I don't think it matters.  I guess you could give it a light sand if you want. It was then painted with French grey acrylic paint thinned with quite a bit of water (which will tend to raise the grain again so I suggest you just relax and live with it). A slightly thicker coat was added here and there to get 'grading' of colour which imitates uneven wear of the painted finish. 
The stain on the back is fairly random. Extra dirty wash was 'painted' along the top where it settles into the valleys and then runs out and down the back.

Something a little prettier, the desk is another piece purchased already stained and varnished, it was treated in a similar way to the chair above but without the grey wash.  This chair originally had a pine-look seat and dark green back.  After a light sanding it was painted with a 2-3 of coats of dark brown followed by several coats of light green, each one a slightly different shade, then sanded at wear points and finished with the dark wood stain 'dirty wash'.  I'm not sure if it will stay this colour or get a few coats of grey wash.  

The roses are cheap ribbon roses, I'm sure you've seen bunches of them in craft supply stores.  The original colour was a very bright pink.  They've been painted with a thick coat of gesso, it soaks into the ribbon in a random way giving nice uneven shading.  I think these make nice big shabby roses to add a little colour here and there. The basket was a natural colour that I covered with gesso.   You've probably guessed by now that gesso is a favourite of mine! 

I hope this will encourage a few of you to play with some 'cheap and cheerful' purchased or handmade pieces to create an individual look.  They don't have to be grunged/aged as much as some of these, just go for colours and finishes that will suit your settings.  Most of all just have fun

~left click the pics to enlarge ~

The white journal on the desk is by Glenda at Peppercorn Minis - she makes them in various sizes and colours to suit different settings and scales, she sells them in her Etsy store (linked on her blog) for a very reasonable price.

The portrait on the desk is one of my maternal great grandfathers, 'keeping it in the family as usual :)